Triển Khai Cognito Và S3 Bucket
Trong phần này, chúng ta sẽ tạo Cognito User Pool, Identity Pool và S3 bucket lưu tệp tải lên dựa trên SAM:
Bạn cần cài đặt SAM CLI và cấu hình credentials trước khi thực hiện phần này.
- Chạy câu lệnh sau để khởi tạo một SAM project:
#Step 1 - Download a sample application
sam init
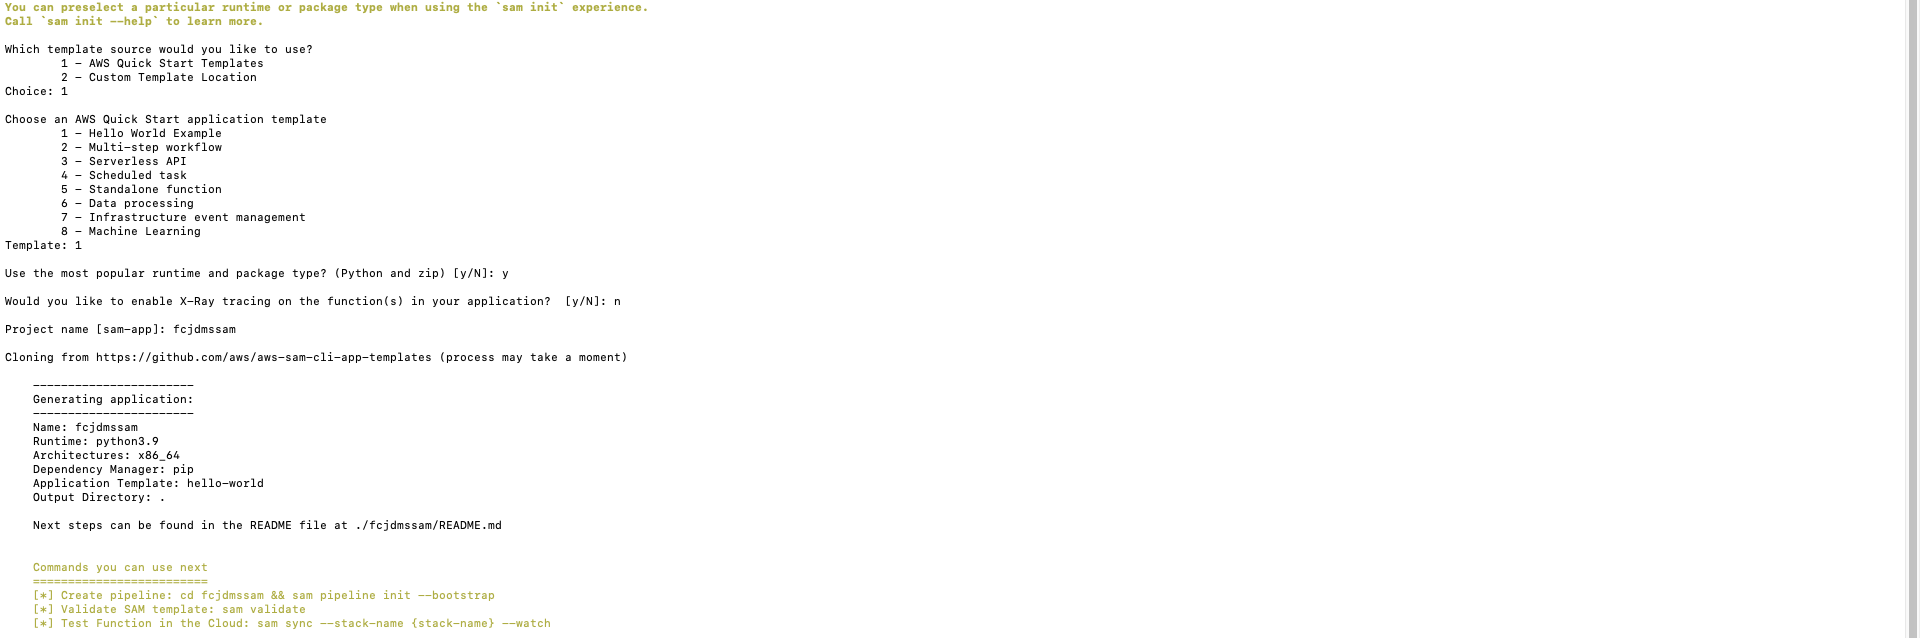
- Chọn các thông tin như sau:
  Which template source would you like to use?
	  1 - AWS Quick Start Templates
	  2 - Custom Template Location
  Choice: 1

  Choose an AWS Quick Start application template
	  1 - Hello World Example
	  2 - Multi-step workflow
	  3 - Serverless API
	  4 - Scheduled task
	  5 - Standalone function
	  6 - Data processing
	  7 - Infrastructure event management
	  8 - Machine Learning
  Template: 1

  Use the most popular runtime and package type? (Python and zip) [y/N]: y
  Would you like to enable X-Ray tracing on the function(s) in your application?  [y/N]: n
  Project name [sam-app] : fcjdmssam
- Mở SAM project bằng trình chỉnh sửa. Mở tệp template.yaml
- Xoá phần không cần thiết
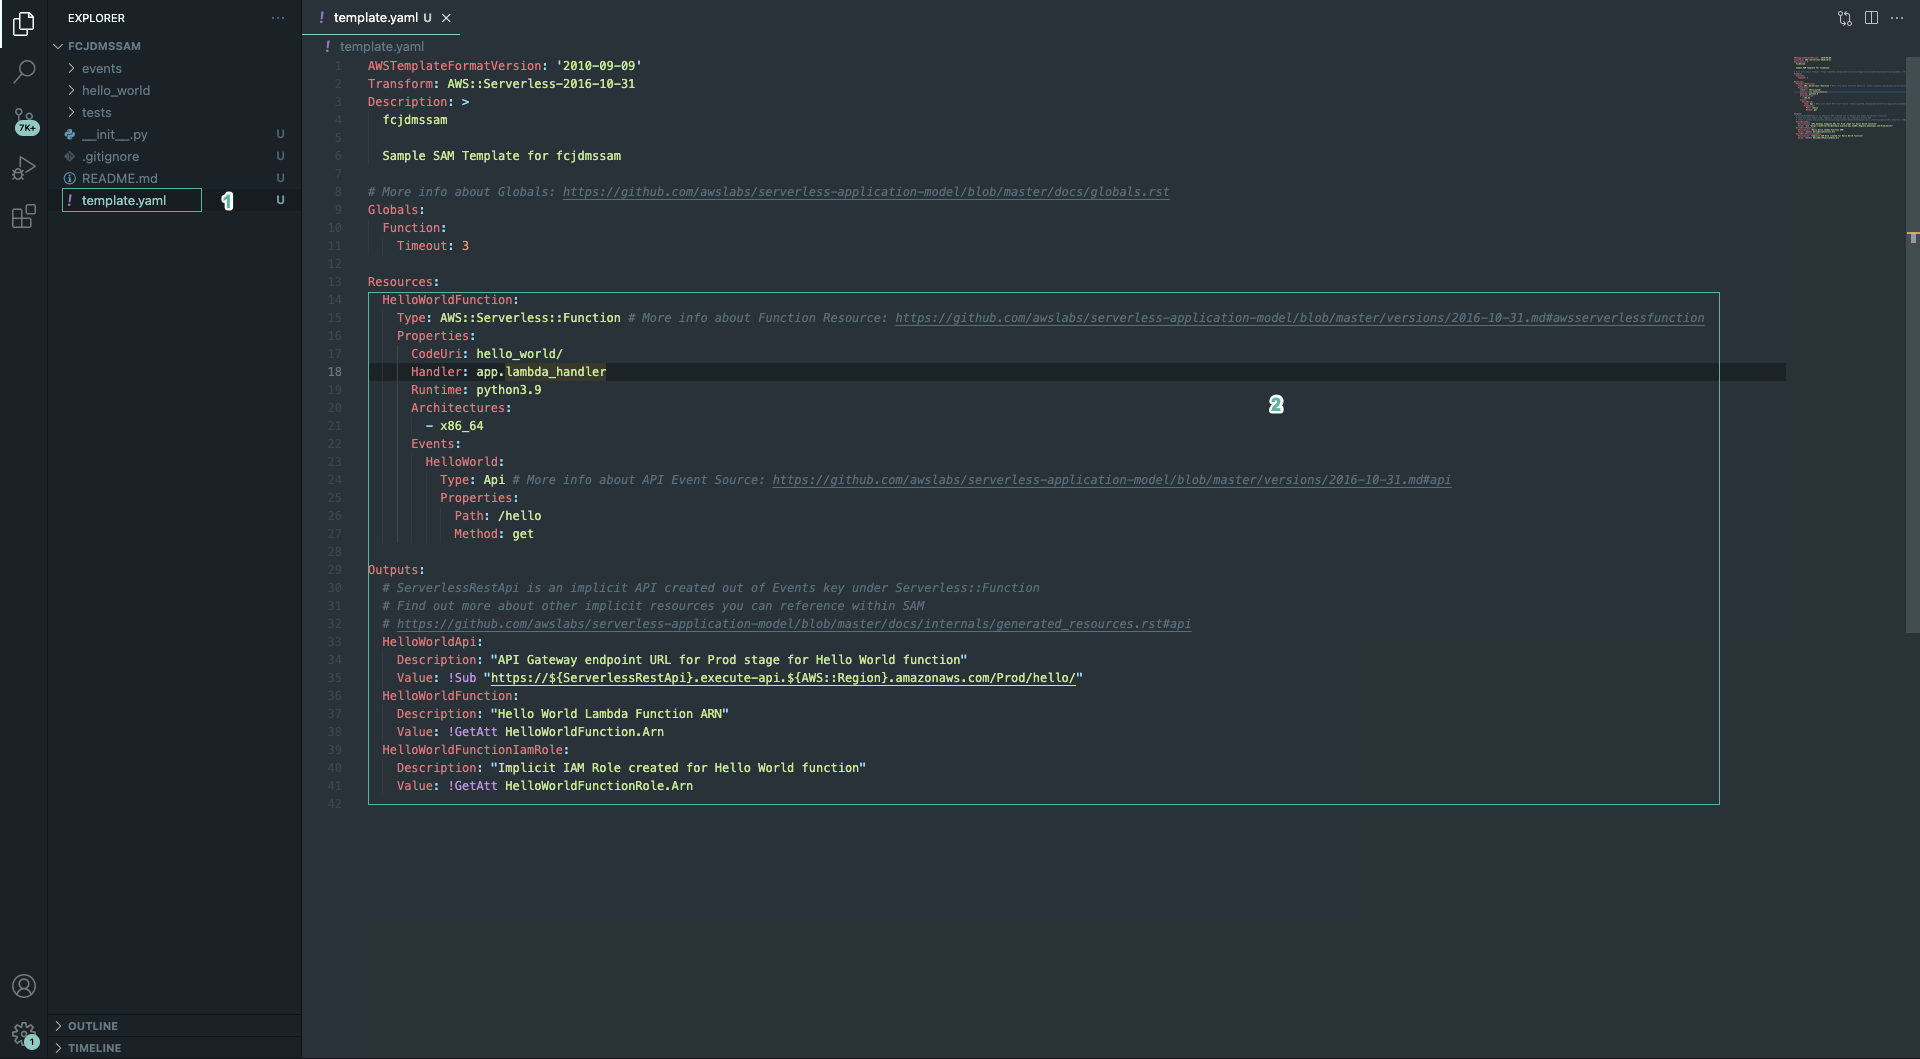
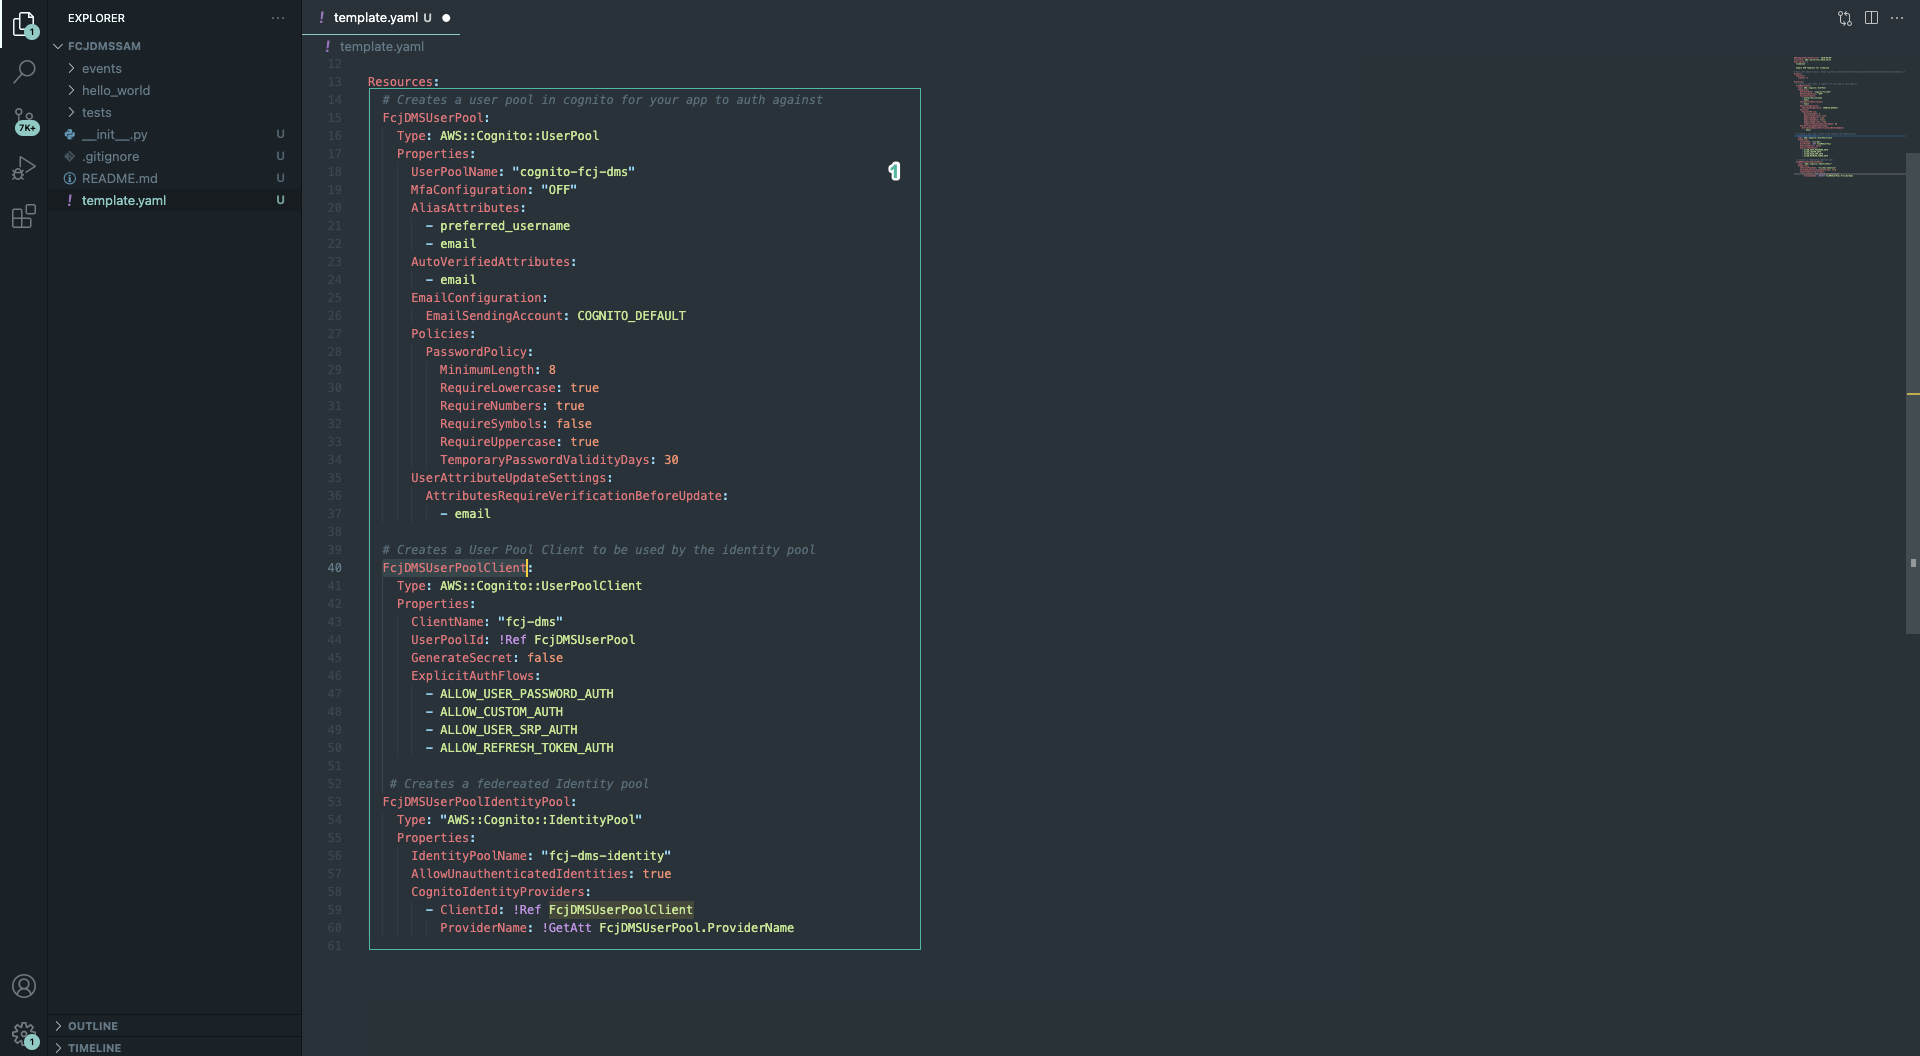
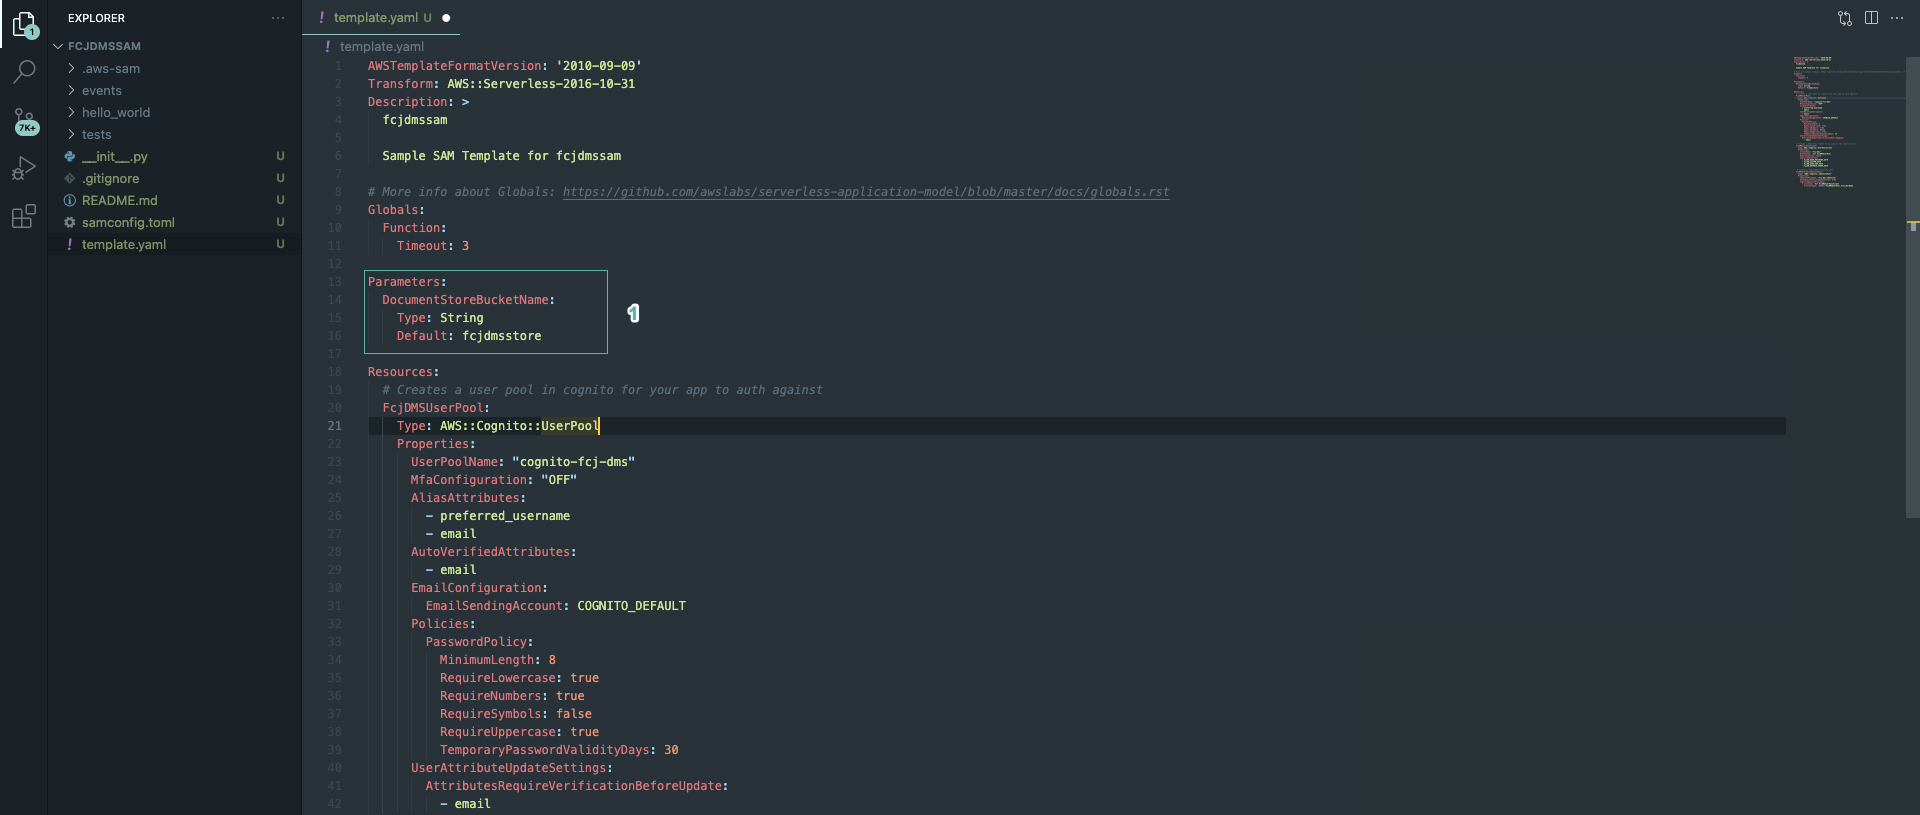
- Sao chép đoạn code sau vào phần Resources:
  # Creates a user pool in cognito for your app to auth against
  FcjDMSUserPool:
    Type: AWS::Cognito::UserPool
    Properties:
      UserPoolName: "cognito-fcj-dms"
      MfaConfiguration: "OFF"
      AliasAttributes:
        - preferred_username
        - email
      AutoVerifiedAttributes:
        - email
      EmailConfiguration:
        EmailSendingAccount: COGNITO_DEFAULT
      Policies:
        PasswordPolicy:
          MinimumLength: 8
          RequireLowercase: true
          RequireNumbers: true
          RequireSymbols: false
          RequireUppercase: true
          TemporaryPasswordValidityDays: 30
      UserAttributeUpdateSettings:
        AttributesRequireVerificationBeforeUpdate:
          - email

  # Creates a User Pool Client to be used by the identity pool
  FcjDMSUserPoolClient:
    Type: AWS::Cognito::UserPoolClient
    Properties:
      ClientName: "fcj-dms"
      UserPoolId: !Ref FcjDMSUserPool
      GenerateSecret: false
      ExplicitAuthFlows:
        - ALLOW_USER_PASSWORD_AUTH
        - ALLOW_CUSTOM_AUTH
        - ALLOW_USER_SRP_AUTH
        - ALLOW_REFRESH_TOKEN_AUTH

  # Creates a federeated Identity pool
  FcjDMSUserPoolIdentityPool:
    Type: "AWS::Cognito::IdentityPool"
    Properties:
      IdentityPoolName: "fcj-dms-identity"
      AllowUnauthenticatedIdentities: true
      CognitoIdentityProviders:
        - ClientId: !Ref FcjDMSUserPoolClient
          ProviderName: !GetAtt FcjDMSUserPool.ProviderName
Đoạn code dùng để khởi tạo các tài nguyên:
- Một User Pool: Cho phép người dùng đăng nhập bằng username, xác thực tài khoản bằng email và thiết lập chính sách mật khẩu
- Một User Pool Client: Cho phép người dùng kết hợp đăng nhập với mật khẩu và tích hợp với User Pool
- Một Identity Pool: Hỗ trợ thông tin chưa được xác thực và thiết lập user pool và client ID.
- Chạy câu lệnh sau để build project:
sam build

- Chạy dòng lệnh sau để kiểm tra SAM template có hợp lệ không:
sam validate

- Chạy dòng lệnh dưới để triển khai SAM:
sam deploy --guided
- Nhập tên cho stack:
fcjdmsapp - Nhập vùng mà bạn muốn triển khai, ví dụ:
ap-southeast-1 - Sau đó nhập các thông tin khác như hình dưới đây:

- Đợi một lúc để tạo CloudFormation stack changeset
- Nhập
ykhi được hỏi Deploy this changeset?

- Kết quả sau khi CloudFormation hoàn thành:

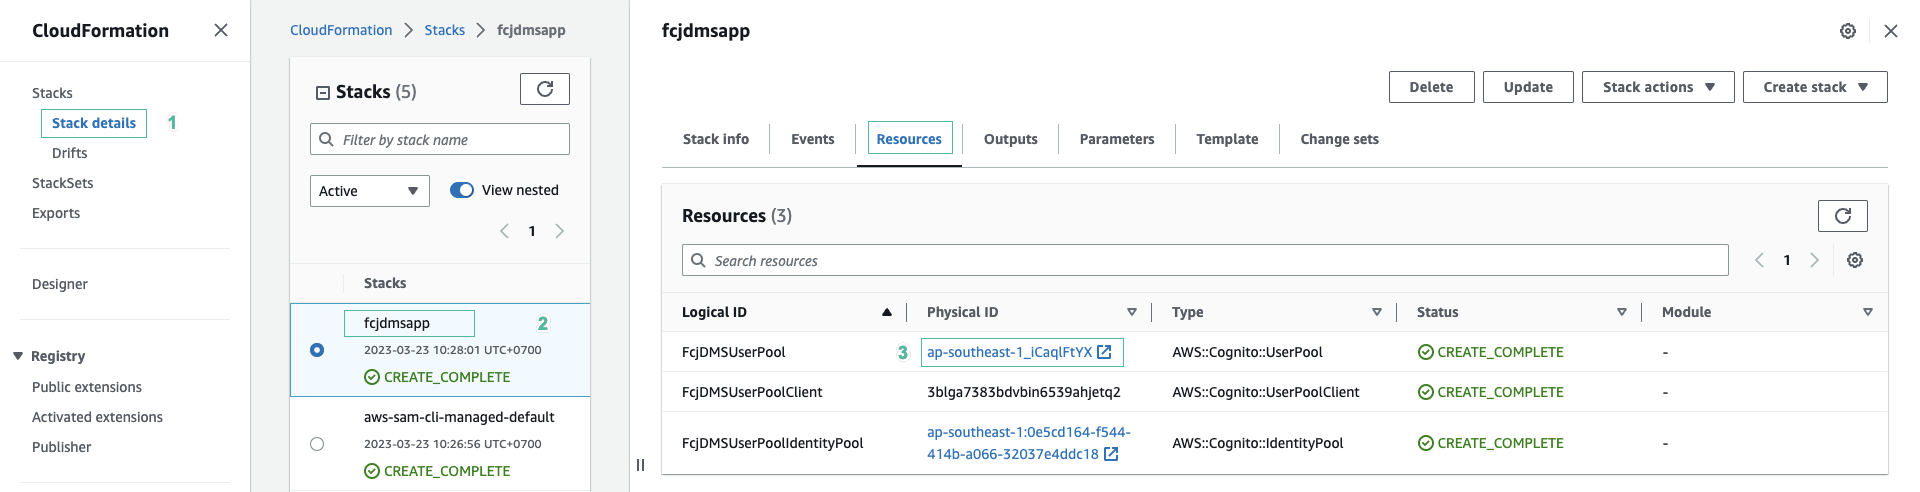
- Mở bảng điều khiển của CloudFormation.
- Chọn Stack details ở menu phía bên trái, sau đó chọn stack fcjdmsapp.
- Chọn tab Resources. Bạn sẽ thấy các tài nguyên mà mình đã mô tả trong template.
- Ấn vào FcjDmsUserPool để mở bảng điều khiển của user pool đó.
- Tiếp theo chúng ta sẽ tạo một S3 bucket lưu các tệp mà người dùng tải lên.
- Mở tệp template và thêm đoạn code sau để khai báo các tham số:
Parameters:
  DocumentStoreBucketName:
    Type: String
    Default: fcjdmsstore
Thay đổi giá trị Default để thay đổi tên cho bucket
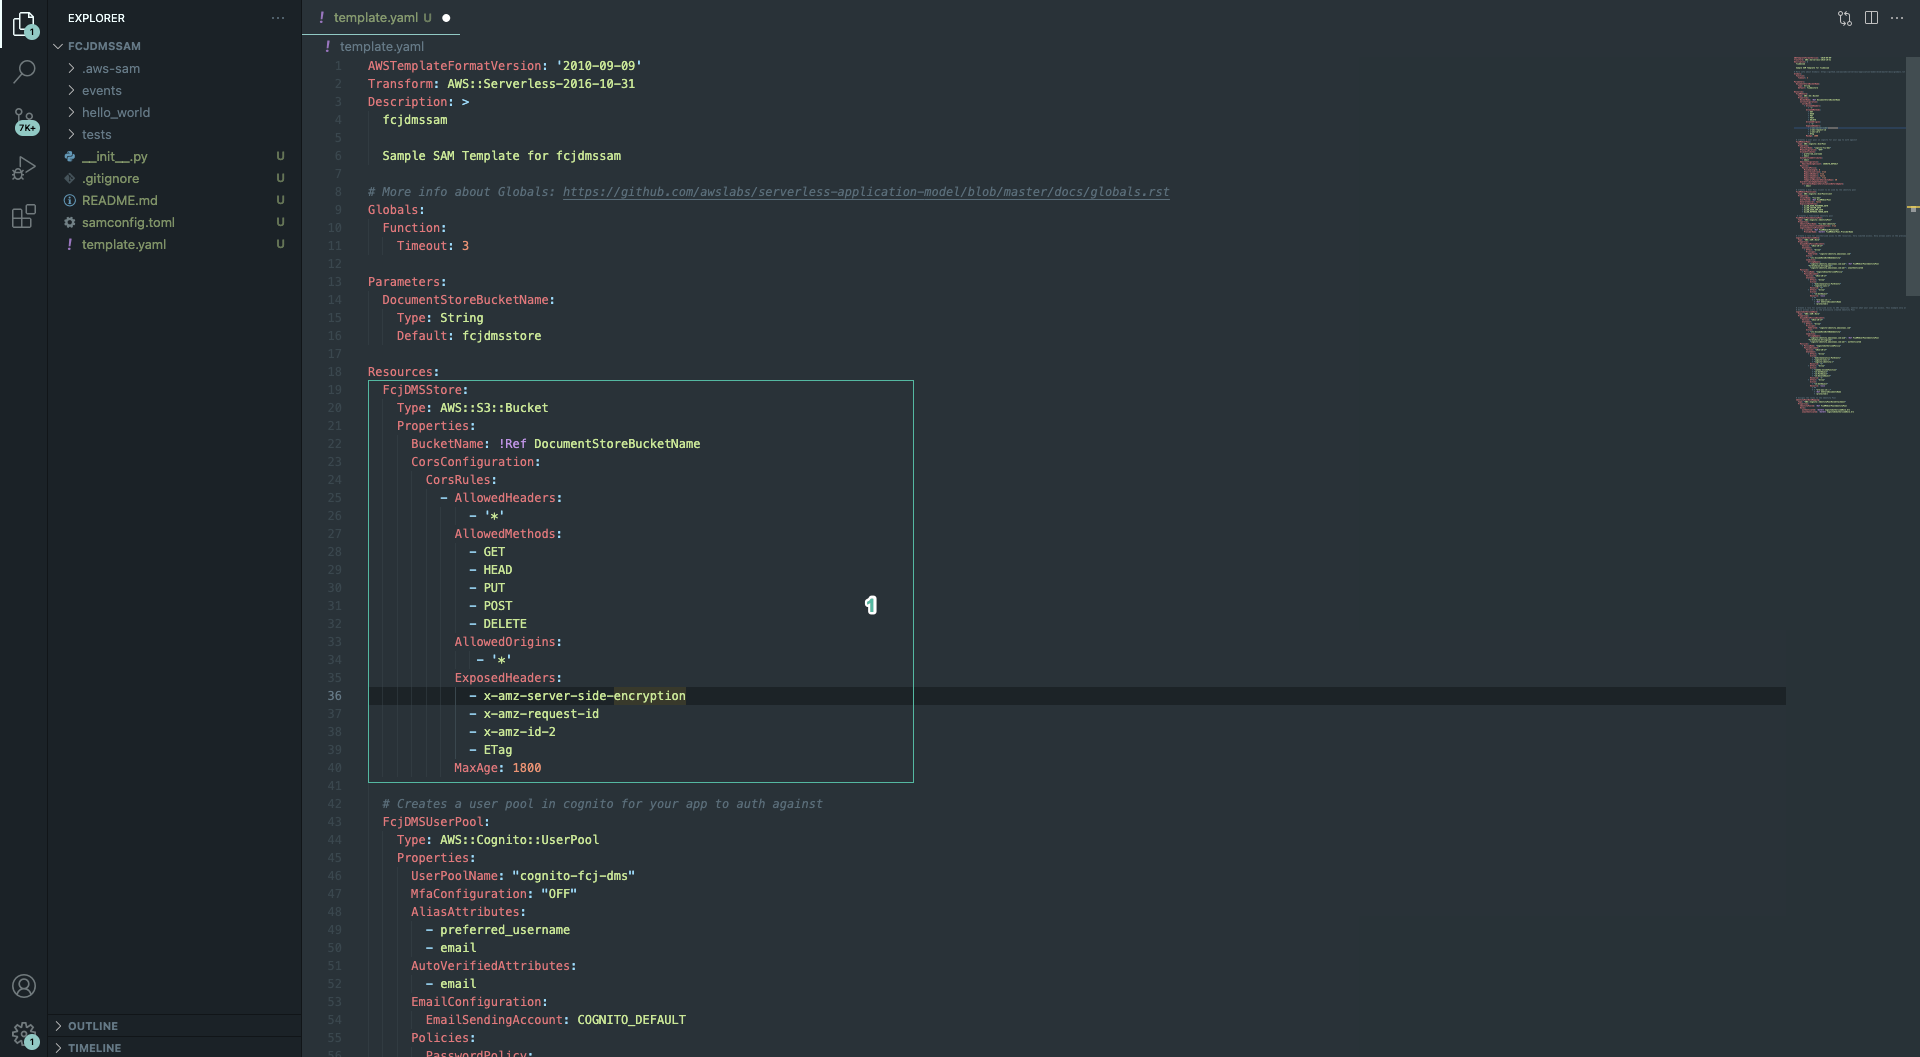
- Thêm đoạn code sau vào tệp:
  FcjDMSStore:
    Type: AWS::S3::Bucket
    Properties:
      BucketName: !Ref DocumentStoreBucketName
      CorsConfiguration:
        CorsRules:
          - AllowedHeaders:
              - '*'
            AllowedMethods:
              - GET
              - HEAD
              - PUT
              - POST
              - DELETE
            AllowedOrigins:
               - '*'
            ExposedHeaders:
              - x-amz-server-side-encryption
              - x-amz-request-id
              - x-amz-id-2
              - ETag
            MaxAge: 1800
Với đoạn code trên, S3 bucket được thiết lập CorsRules cho phép ứng dụng web của chúng ta tương tác với nó.
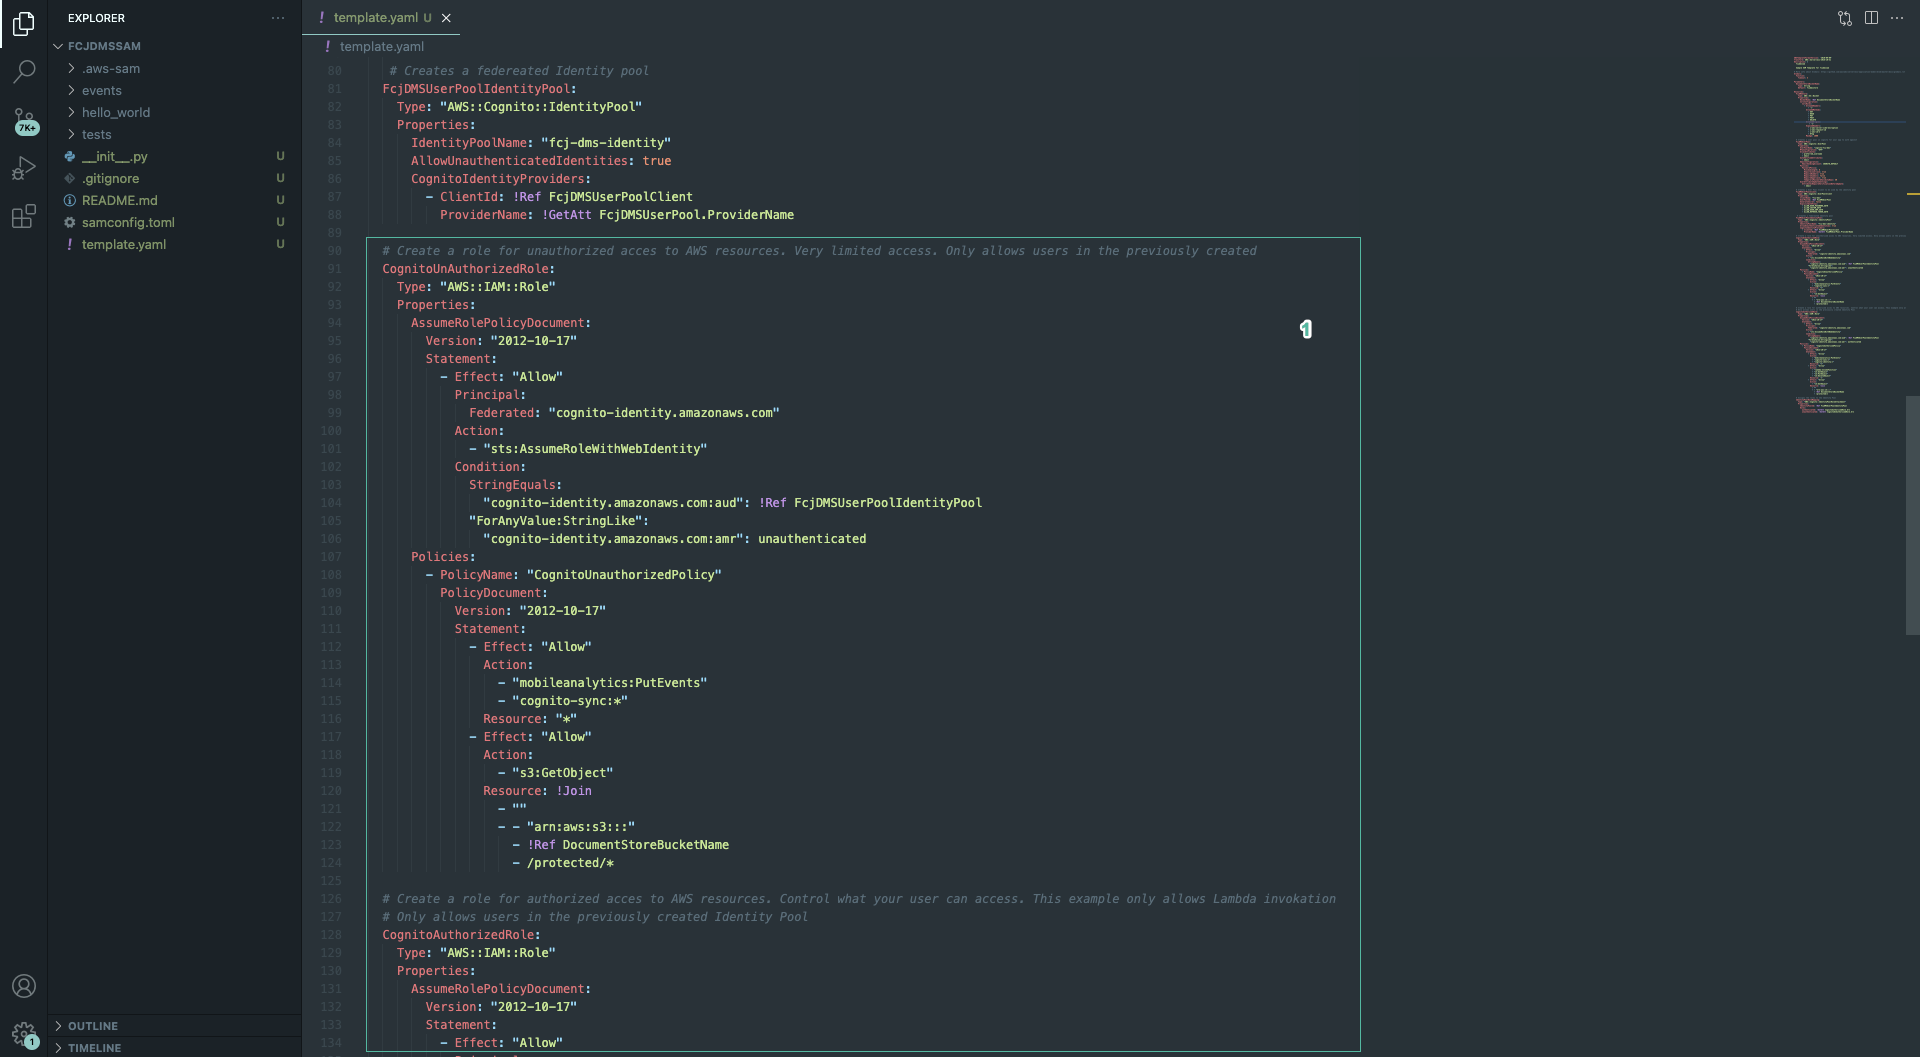
- Tiếp theo chúng ta sẽ tạo role cho các truy cập chưa xác thực và xác thực vào S3. Thêm đoạn code sau vào cuối tệp:
  # Create a role for unauthorized access to AWS resources. Very limited access. Only allows users in the previously created
  CognitoUnAuthorizedRole:
    Type: "AWS::IAM::Role"
    Properties:
      AssumeRolePolicyDocument:
        Version: "2012-10-17"
        Statement:
          - Effect: "Allow"
            Principal:
              Federated: "cognito-identity.amazonaws.com"
            Action:
              - "sts:AssumeRoleWithWebIdentity"
            Condition:
              StringEquals:
                "cognito-identity.amazonaws.com:aud": !Ref FcjDMSUserPoolIdentityPool
              "ForAnyValue:StringLike":
                "cognito-identity.amazonaws.com:amr": unauthenticated
      Policies:
        - PolicyName: "CognitoUnauthorizedPolicy"
          PolicyDocument:
            Version: "2012-10-17"
            Statement:
              - Effect: "Allow"
                Action:
                  - "mobileanalytics:PutEvents"
                  - "cognito-sync:*"
                Resource: "*"
              - Effect: "Allow"
                Action:
                  - "s3:GetObject"
                Resource: !Join
                  - ""
                  - - "arn:aws:s3:::"
                    - !Ref DocumentStoreBucketName
                    - /protected/*

  # Create a role for authorized access to AWS resources. Control what your user can access. This example only allows Lambda invokation
  # Only allows users in the previously created Identity Pool
  CognitoAuthorizedRole:
    Type: "AWS::IAM::Role"
    Properties:
      AssumeRolePolicyDocument:
        Version: "2012-10-17"
        Statement:
          - Effect: "Allow"
            Principal:
              Federated: "cognito-identity.amazonaws.com"
            Action:
              - "sts:AssumeRoleWithWebIdentity"
            Condition:
              StringEquals:
                "cognito-identity.amazonaws.com:aud": !Ref FcjDMSUserPoolIdentityPool
              "ForAnyValue:StringLike":
                "cognito-identity.amazonaws.com:amr": authenticated
      Policies:
        - PolicyName: "CognitoAuthorizedPolicy"
          PolicyDocument:
            Version: "2012-10-17"
            Statement:
              - Effect: "Allow"
                Action:
                  - "mobileanalytics:PutEvents"
                  - "cognito-sync:*"
                  - "cognito-identity:*"
                Resource: "*"
              - Effect: "Allow"
                Action:
                  - "lambda:InvokeFunction"
                  - "s3:GetObject"
                  - "s3:PutObject"
                  - "s3:DeleteObject"
                Resource: '*'
              - Effect: "Allow"
                Action:
                  - "s3:GetObject"
                Resource: !Join
                  - ""
                  - - "arn:aws:s3:::"
                    - !Ref DocumentStoreBucketName
                    - /protected/*

  # Assigns the roles to the Identity Pool
  IdentityPoolRoleMapping:
    Type: "AWS::Cognito::IdentityPoolRoleAttachment"
    Properties:
      IdentityPoolId: !Ref FcjDMSUserPoolIdentityPool
      Roles:
        authenticated: !GetAtt CognitoAuthorizedRole.Arn
        unauthenticated: !GetAtt CognitoUnAuthorizedRole.Arn
- Chạy các câu lệnh sau:
sam build
sam deploy

- Tiếp theo chúng ta sẽ sử dụng amplify để import authentication và storage vào ứng dụng web của mình. Chạy câu lệnh sau tại thư mục gốc của front-end project.
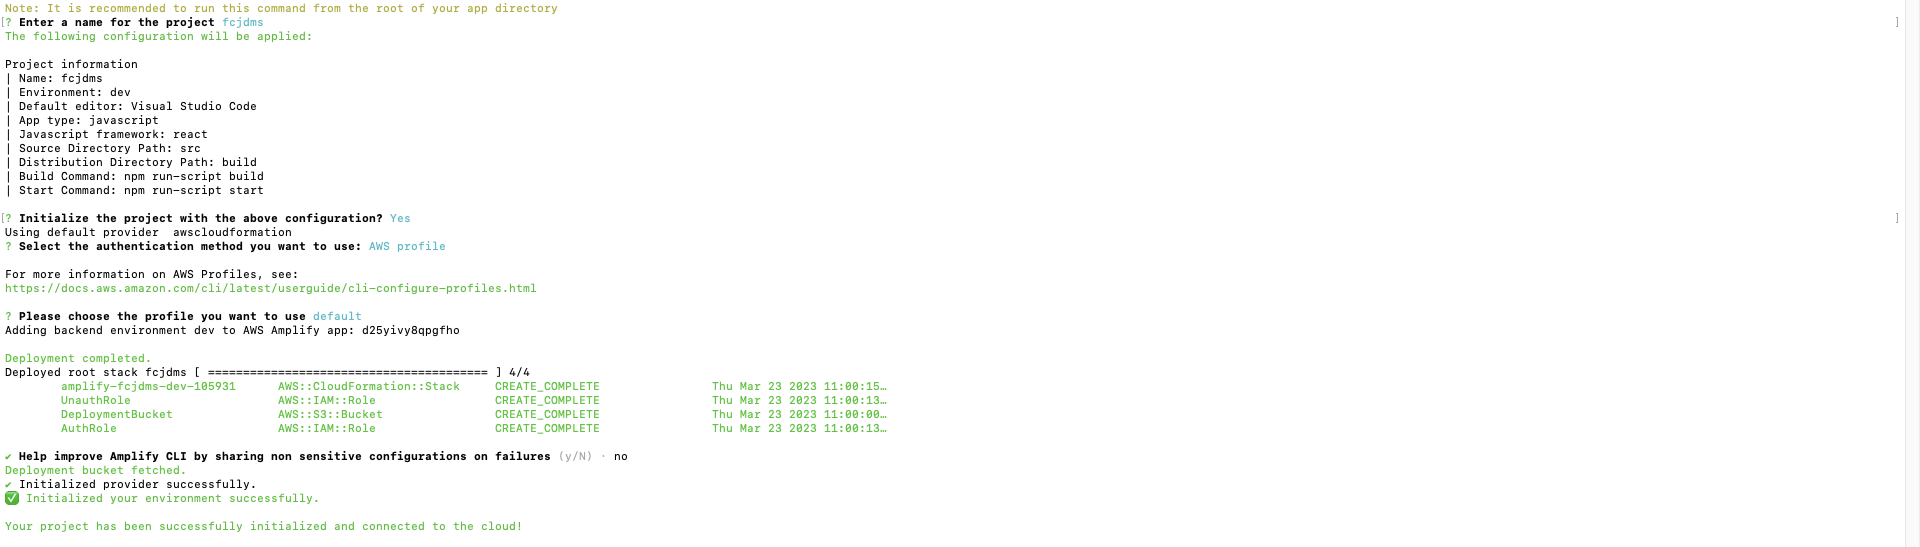
amplify init
-
Nhập theo các thông tin dưới đây:
? Enter a name for the project
fcjdms
The following configuration will be applied:Project information
| Name: fcjdms
| Environment: dev
| Default editor: Visual Studio Code
| App type: javascript
| Javascript framework: react
| Source Directory Path: src
| Distribution Directory Path: build
| Build Command: npm run-script build
| Start Command: npm run-script start? Initialize the project with the above configuration?
Yes
Using default provider awscloudformation
? Select the authentication method you want to use: AWS profileFor more information on AWS Profiles, see:
https://docs.aws.amazon.com/cli/latest/userguide/cli-configure-profiles.html? Please choose the profile you want to use default
? Help improve Amplify CLI by sharing non sensitive configurations on failures (y/N) ›No
Nếu chưa tải project thì chạy các câu lệnh sau:
git clone https://github.com/AWS-First-Cloud-Journey/FCJ-Serverless-DMS
cd FCJ-Serverless-DMS
npm install
- Chạy câu lệnh sau để import authentication vào project:
amplify import auth
- Chọn Cognito User Pool and Identity Pool cho What type of auth resource do you want to import?

- Chạy câu lệnh sau để import storage vào project:
amplify import storage
- Chọn S3 bucket - Content (Images, audio, video, etc.) cho Select from one of the below mentioned services
- Chọn bucket mà bạn đã tạo từ các bước trên

- Chạy câu lệnh:
amplify pushđể cập nhật tài nguyên cloud.
